
Canyoneering Gear
Module 18
This module covers the must-have gear for most popular canyons on the Colorado Plateau.
While comprehensive, some canyons may require additional items or advanced canyoneering items (and skills)
Essential Gear: Core gear needed for safe canyoneering, regardless of the canyon.
Optional Gear: Specific to canyon conditions (e.g., water, potholes, rope length) and group needs.
Essential Gear:
(every canyon)
Optional Gear:
(canyon specific)
Helmet
Harness
Descender/Rappel Device
Rope(s)
Canyoneering Shoes
Backpack
Personal Anchor System (PAS) | Safety Tether
Carabiners (3 minimum)
Quick Links (Rapides)
Webbing
Quick Links/Rapides
Webbing
Dry Bag
Water Bottle/Reservoir/Bladder
Headlamp
Light Jacket/Rain Jacket/Extra Socks
GPS
First-Aid Kit
LifeStraw (water-filter)
Sunscreen
Pull-Cord
Rope Bag
Full Wetsuit
Shortie Wetsuit
Drysuit
Slings
Booties & Socks
Gloves
Elbow Pad
Knee Pad
Radios
Whistle
Essential Gear:
Helmet
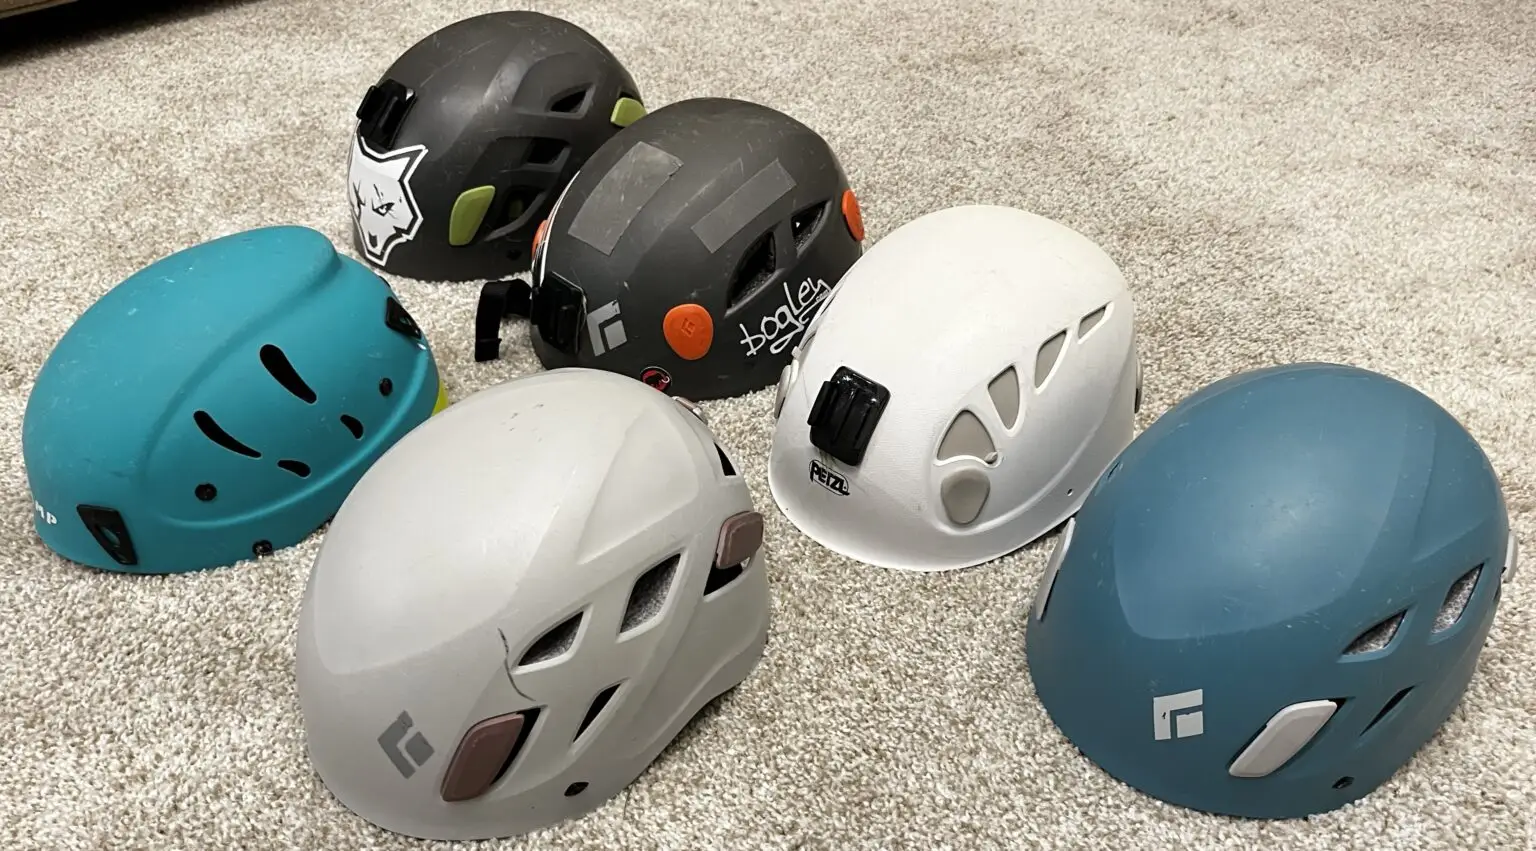
In technical slot canyons, rappelling and down-climbing in tight spaces pose risks from loose rocks falling from above. Rocks can be accidentally dislodged by others or from cliff ledges.
Wearing a helmet is crucial for protection—it’s no longer just an optional accessory! Even experienced canyoneers can’t control what others do.
Helmets are required gear for all canyon adventures.
Most helmets are unisex, but some brands offer tailored versions for men or women.
My Suggestions:
-
Petzl Elios
-
Petzl Meteor
-
Black Diamond Half Dome
-
Black Diamond Vector
-
Wild Country Synchro
Buy From:
Harness
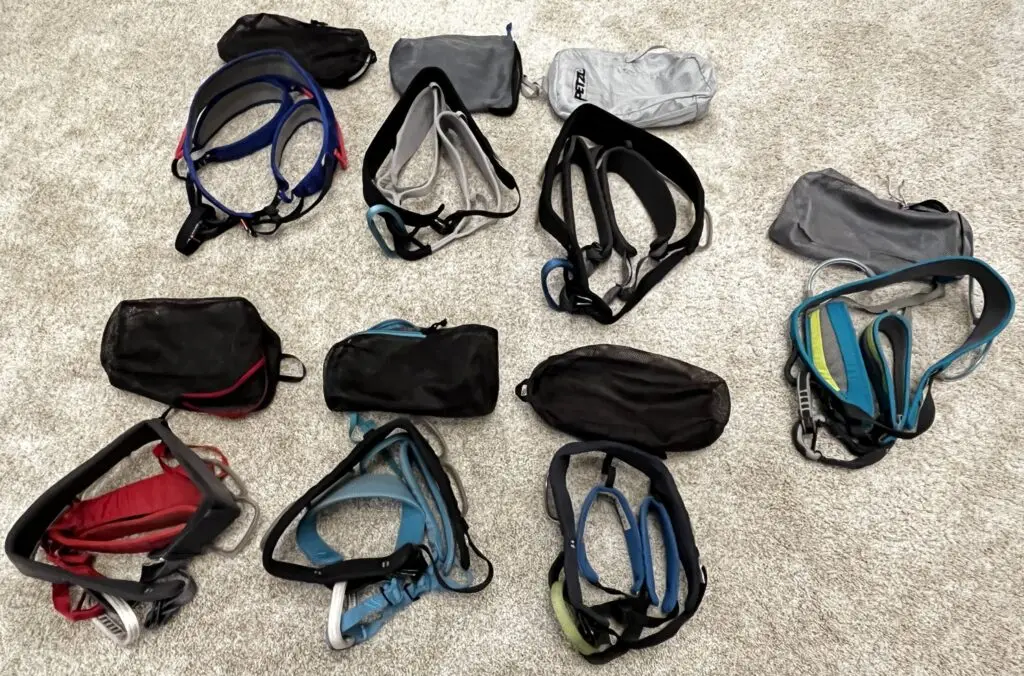
For long-term canyoneering, a comfortable harness with proper padding around the waist and leg loops is essential, especially on longer rappels.
The Black Diamond Momentum harness is a great choice—it’s padded, comfortable for extended use, and includes two gear loops and a belay loop for secure connections.
Before purchasing, try on different models in-store (e.g., REI) to ensure a good fit. Harnesses come in both male and female sizes, with prices ranging from $40 to $150, offering options for different budgets.
My Suggestions:
-
Black Diamond Momentum
-
Petzel Corax
-
Mammut Ophir
-
Wild Country Syncro
Buy From:
Descender/Rappel Device
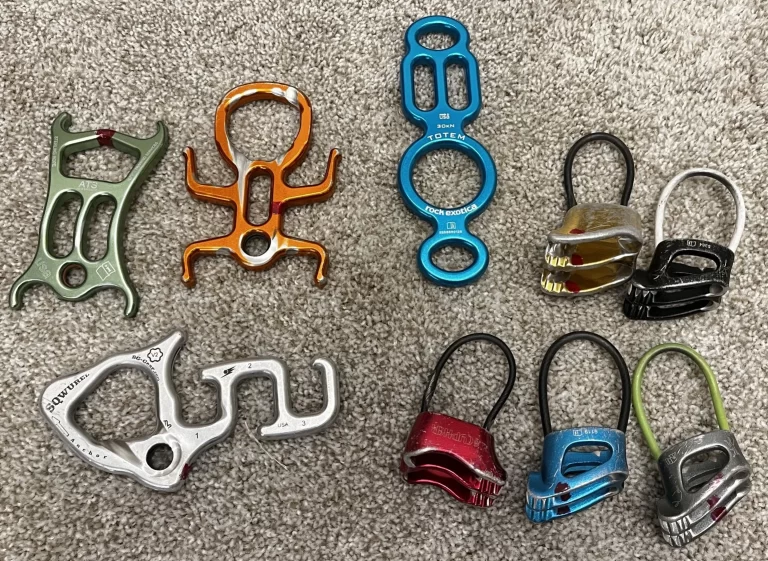
A descender connects you from your harness to the rope and controls your descent. For longer rappels, choose a device that allows friction adjustment and tie-offs mid-rappel. Devices like the ATC and Figure 8 work for shorter rappels (under 50 feet) but lack friction control for longer descents, especially if you weigh more than 140 pounds.
Popular options include the CRITTR, SQWUREL, and TOTEM. The SQWUREL (my favorite) allows friction adjustment but may twist the rope, so untwist before the next rappel. Always bring two descenders per person to avoid accidents like dropping one.
Before buying, ensure the device allows:
-
Friction adjustment mid-rappel
-
Tie-offs to stop during rappel
Once you’ve picked your device – find a safe, low-angled practice rappel spot and really get to know your descender! Try adding friction, tying off, experimenting with different speeds, and see if your device twists the rope.
My Suggestions:
-
BluuGnome: SQWUREL v4
-
CanyoneeringUSA: CRITR3
-
Petzl PIRANA
-
Sterling ATS
-
Rock Exotica: Totem
-
Black Diamond Equipment: ATC (as a backup too)
Buy:
Rope
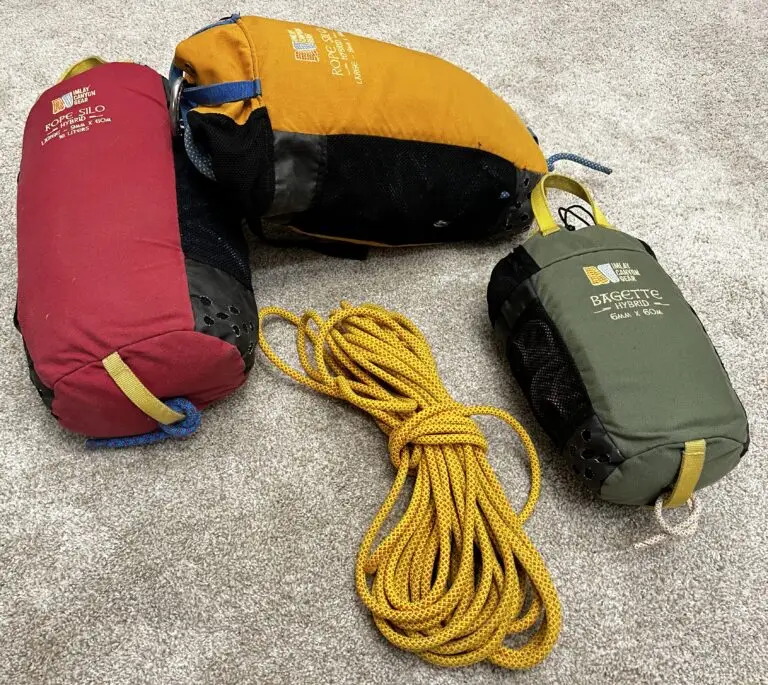
Rappelling is a key part of canyoneering, requiring ropes designed specifically for the sport. Avoid hardware store ropes—they’re not safe for climbing or rappelling. Instead, use static ropes from climbing companies.
Static vs. Dynamic Ropes:
-
Static ropes: Limited stretch, lightweight, don’t absorb water, and provide controlled rappels.
-
Dynamic ropes: Designed for climbing, they stretch and absorb water, making them unsuitable for canyoneering.
Why Static Ropes Are Ideal:
-
Minimal stretch for stable descents and heavy loads.
-
Excellent knot security and durability on sharp, rough surfaces.
Beginner Recommendations:
-
Start with 9 mm static ropes for better control and safety.
-
Suggested sizes:
-
120 ft for shorter rappels.
-
210 ft for most trade canyons.
-
-
Add a pull-cord for rope retrieval.
As you gain experience, you can explore thinner ropes, but these require advanced friction management.
Pro Tip: Test your ropes and practice with them and your descender/rappel device before tackling real canyons!
Buy From:
Canyoneering Shoes
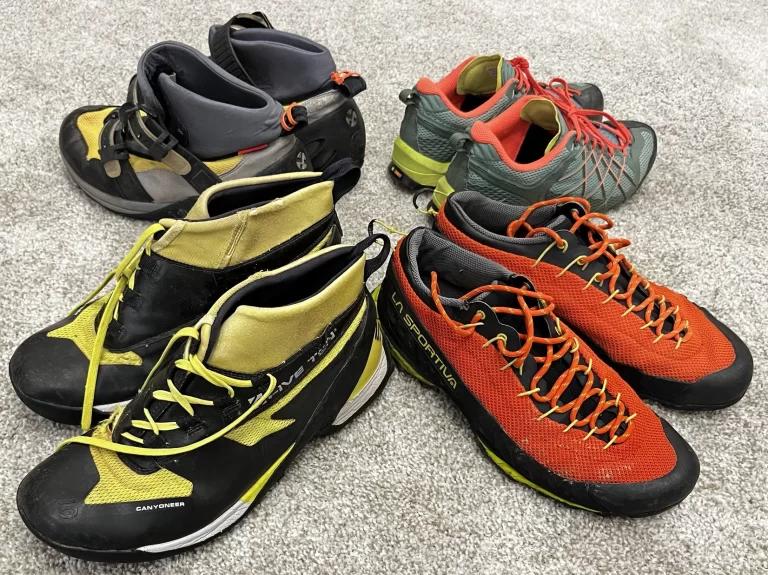
Canyoneering shoes are designed for durability, traction, and ankle support, making them essential for navigating slick sandstone and slippery potholes. Sneakers might work for short, simple trips, but serious canyoneers should invest in high-quality shoes.
Why They’re Special:
-
Superior grip on slick surfaces.
-
Ankle support for rough, wet, or rocky terrain.
-
Pairs perfectly with neoprene socks for warmth.
Pro Tips:
-
Size up 1/2 size to fit neoprene socks.
-
Expect to spend $80–$300—your feet will thank you!
My Suggestions: La Sportiva: TX3/4
Buy From:
Canyoneering Backpack
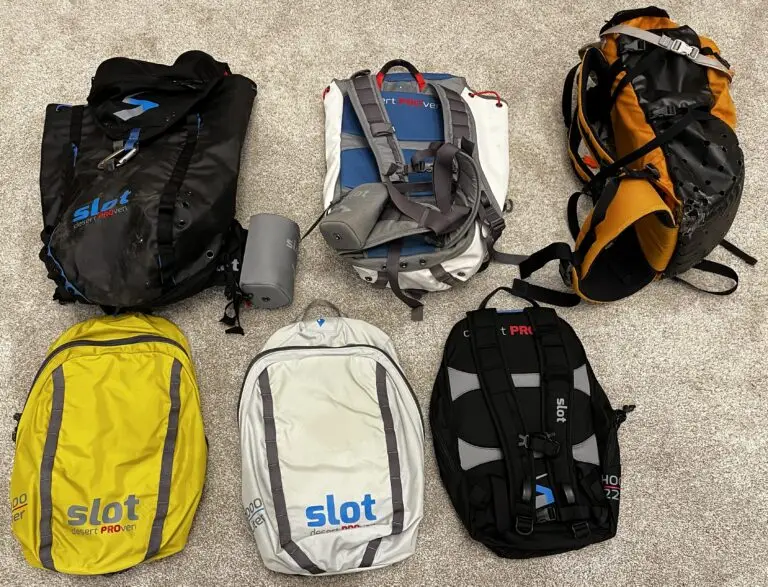
At first glance, a canyoneering backpack may seem like a hiking pack, but it’s built for the unique challenges of canyons.
Durability:
-
Made from rugged materials (e.g., canvas or heavy-duty polyester) that resist rips from rocks and rough terrain—unlike standard hiking packs.
Drainage:
-
Built-in grommets or mesh allow water to drain quickly, preventing the pack from becoming a soggy, 8-24 lb anchor.
Organization:
-
Dedicated compartments for helmets, wetsuits, and gear make packing efficient and accessible.
Waterproof Options:
-
Fully waterproof packs keep gear dry but may sacrifice easy organization.
Recommendation:
-
Imlay Canyon Gear (brand),
-
Slot (brand),
-
Black Diamond (brand)
Pro Tip: For serious canyoneering, invest in a specialized pack. For occasional trips (e.g., The Subway in Zion), a hiking pack will suffice but expect wear and tear.
Buy From:
Personal Anchor System (PAS) or Safety Tether
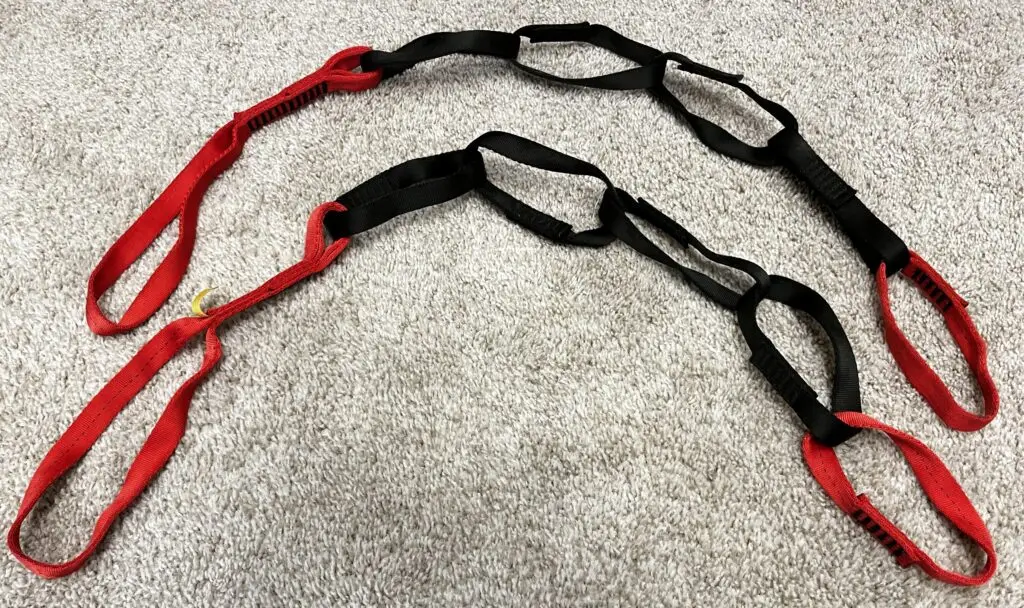
A Personal Anchor System (PAS), or “safety tether,” is a must-have for canyoneering safety.
Purpose:
-
Keeps you securely connected to the anchor while prepping your rappel ropes.
How It Works:
-
A sturdy, closed-loop sling attaches to your harness (via girth hitch or carabiner).
-
Provides a safe link to the anchor, especially on cliff edges with drops from 10–400 feet.
When ready to rappel, simply unclip your PAS from the anchor, reattach it to your harness, and descend safely on the rappelling rope!
My Suggestion: Sterling: Chain Reactor; Petzl Connect Adjust
Buy From:
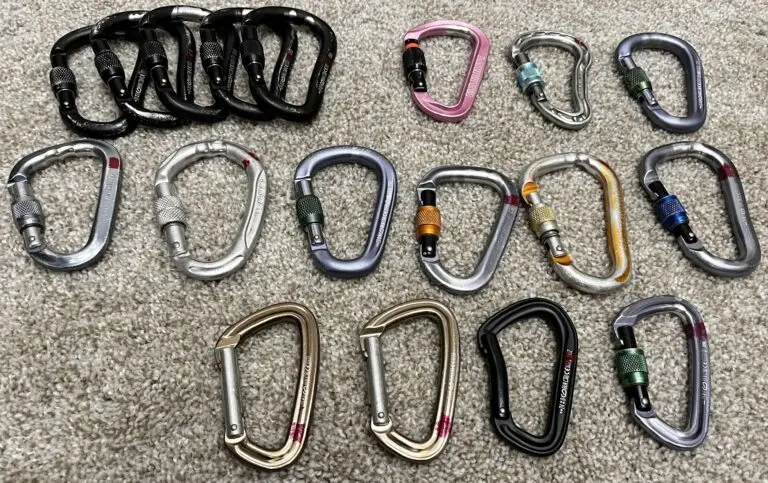
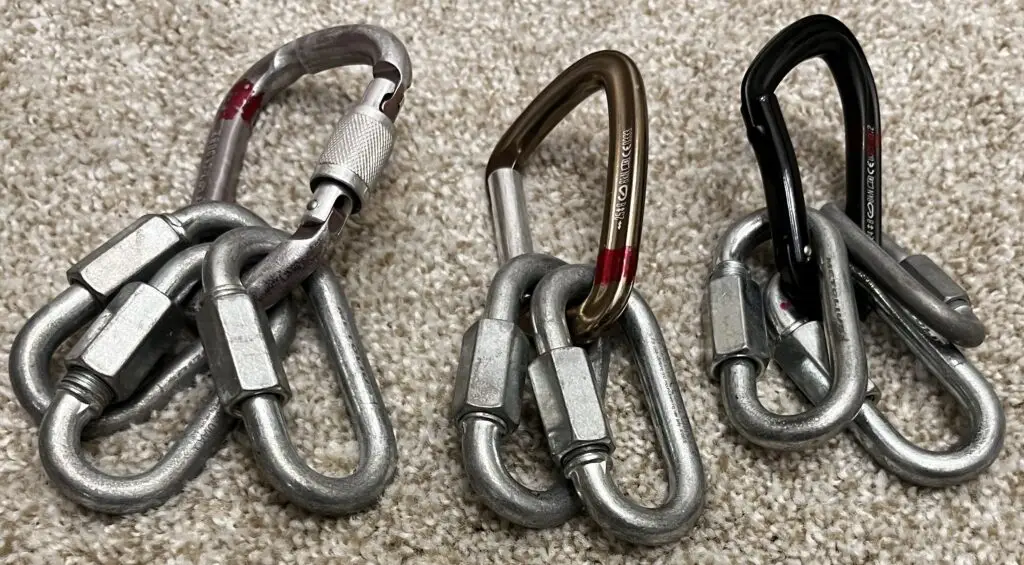
Carabiners (3 minimum/person, locking carabiners)
Carabiner Essentials:
-
Pronounced “care-a-bean-er”
-
A rated carabiner is crucial for canyoneering safety.
-
Look for kN markings (e.g., “kN 17”). One kN ≈ 225 lbs. of force.
-
Bring at least 3 locking, screw-gate carabiners per person
Force and Falling:
-
Force = Mass x Acceleration (measured in newtons or kN).
-
Gravity accelerates you at 9.8 m/s² (32 ft/s²).
Why It Matters:
-
A short fall (10 ft): Generates ~2.5 kN (560 lbs. of force).
-
A longer fall (20 ft): Doubles speed, generating ~5 kN (1,120 lbs. of force).
-
Anchors must absorb this force; weak anchors (e.g., bushes, roots, logs, bolted anchors) can fail.
Pro Tips:
-
Avoid bouncing on rappel—it increases force on anchors and ropes!
-
Carry multiple carabiners and always inspect your gear and anchor setup!
My Suggestion: No preference; as long as it is a screw-gate carabiner
Buy From:
Quick Links/Rapides
Purpose:
Quick Links (or rapides) connect ropes to anchor points and are designed for the rappelling and knot points at the anchor.
Material:
-
Made of stainless steel or aluminum, they are durable and affordable, making them suitable for leaving behind when necessary.
How to Use:
-
Tie webbing to a natural or fixed-anchor using a water knot.
-
Attach the quick link to the webbing.
-
Thread your rappelling rope through the quick link—NOT the webbing!
Safety Tip:
Never rappel on a rope directly through webbing. Friction can easily cut through webbing, just as ropes can cut through sandstone.
Buy From:
-
Maillon Rapide (made by Peguet)
Webbing
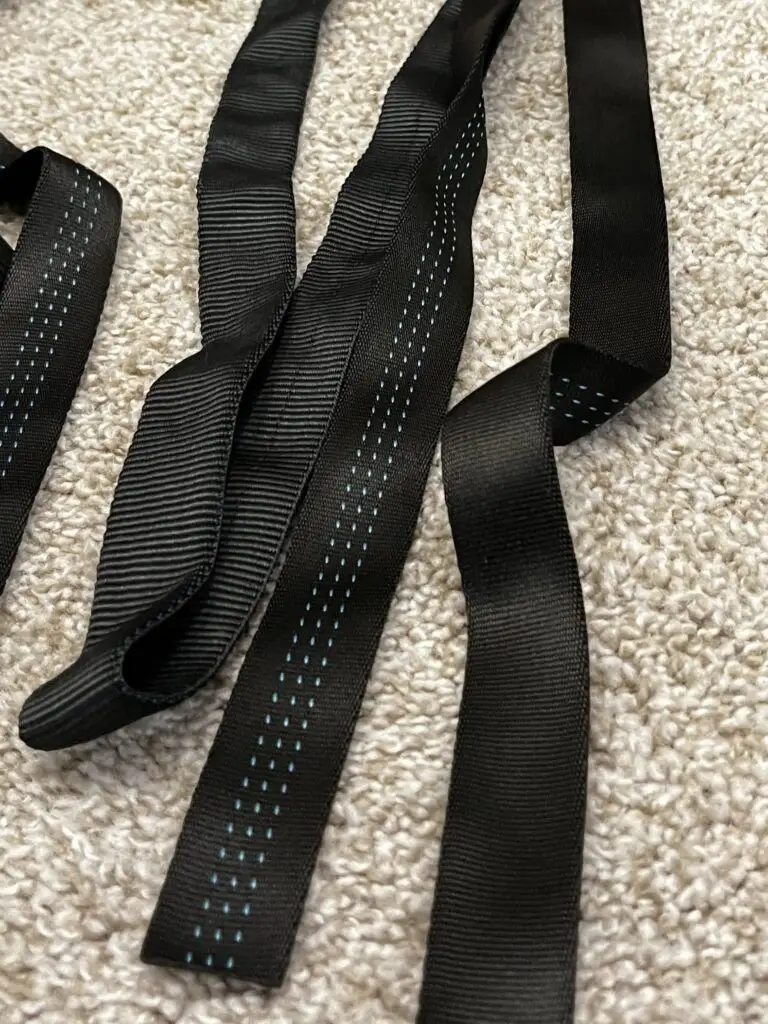
What Is It?:
Flat, durable nylon or polyester strap used to create anchors and slings for securing rappelling ropes. Flexible enough to wrap around rocks, trees, or fixed anchors.
How Much to Bring:
Each person should carry at least 30 feet to replace old or damaged anchors. Environmental wear and water can weaken webbing over time.
Safety Tip:
Never trust webbing that “looks okay.” Replacing it ensures reliability and safety.
You will come across webbing in canyons. But is it one day old? One week or a year? Your literal life is dependent on the safety and webbing tying around that anchor – please be mindful.
Tying Webbing:
Only use a water knot (see “Canyoneering Knots”) and leave at least 3 inches of tail for security.
Buy From:
Dry Bag
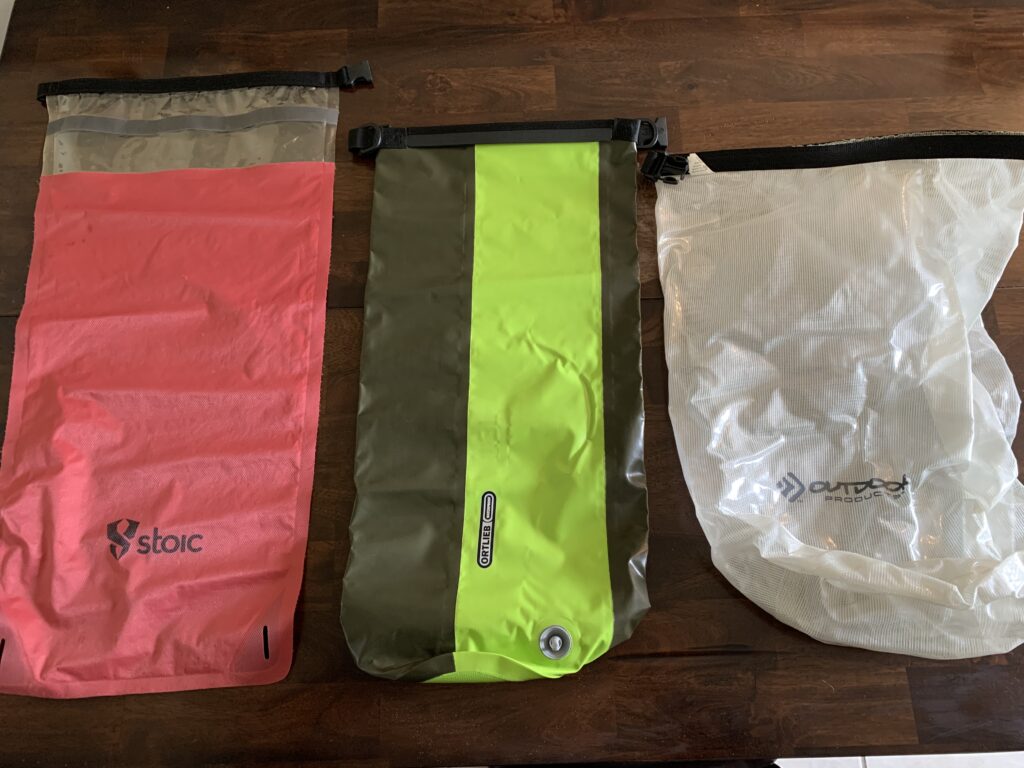
Why Use Dry Bags?:
A garbage bag might seem like a quick fix, but it’s no match for canyon conditions! One puncture, and your dry clothes (and lunch) could be ruined.
A Modern Solution:
Quality dry bags are widely available and reliable for keeping gear dry. Look for ones with built-in valves for added convenience.
Why a Valve Matters:
Seal the bag by rolling down the top.
Purge excess air through the valve for a compact fit.
Ensures dryness while saving space in your pack.
Pro Tip: Don’t forget to close the valve after purging!
Buy From:
Water Bottle/Bladder/Reservoir
Hydration is essential for safety in canyoneering. For the most part, you are in arid landscapes where there is typically, little water. Choosing between hard-cased water bottles (e.g., Nalgene) and water bladders/reservoirs depends on personal preference and the demands of the canyon.
Water Bottles (e.g., Nalgene)
Pros:
Durability: Can withstand rugged environments and accidental drops.
Ease of Cleaning: Wide-mouth bottles are easy to clean and refill.
Versatility: Doubles as a container for mixing drinks or storing items.
Cons:
Bulkiness: Can be bulky in a pack and harder to access mid-hike.
Limited Capacity: Usually holds less water compared to bladders.
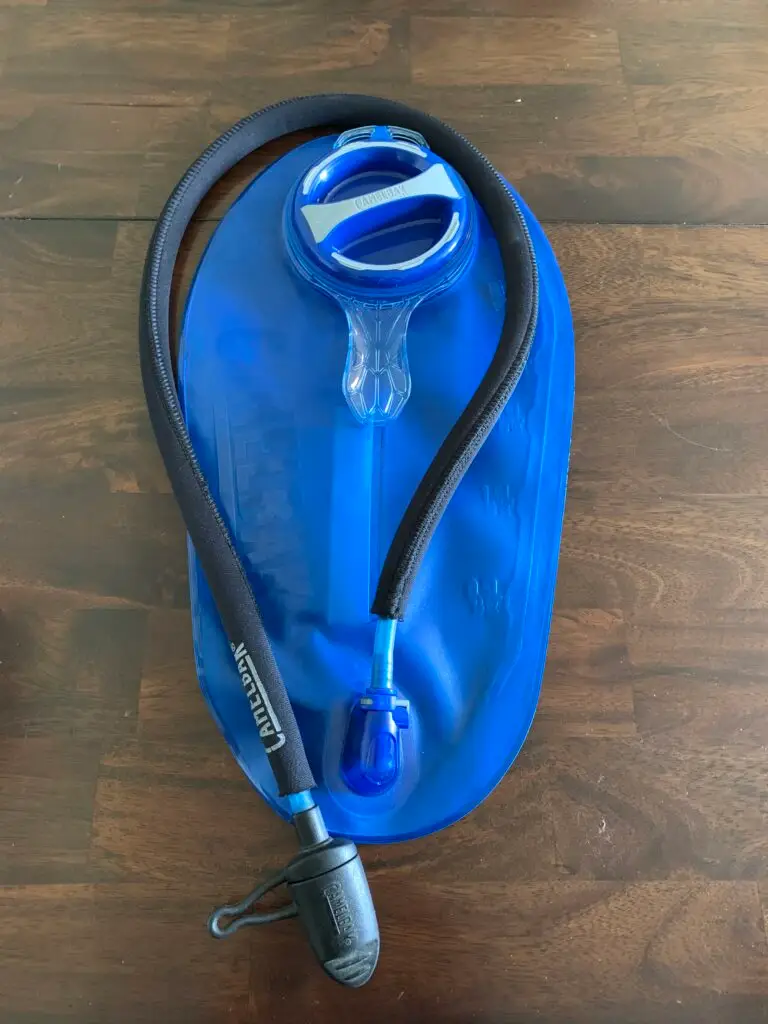
Water Bladders/Reservoirs
Pros:
Convenient Access: Hose allows for hands-free drinking while moving.
Space-Saving: Conforms to the shape of your pack for better weight distribution.
Larger Capacity: Often holds 2-3 liters, reducing the need for frequent refills.
Cons:
Harder to Clean: Narrow openings and long hoses can trap bacteria.
Puncture Risk: Less durable than bottles in rough terrain.
Leak Concerns: Damage can lead to significant or complete water loss.
Recommendation: For short trips or rugged canyons: Water Bottles for durability and simplicity. For long, endurance-heavy days: Water Bladders for convenience and capacity. Many canyoneers opt to carry both to maximize versatility.
Pro Tip: Always test your gear and carry more water than you think you’ll need! And don’t forget to pack your LifeStraw and water purifier too.
Buy From:
Headlamp
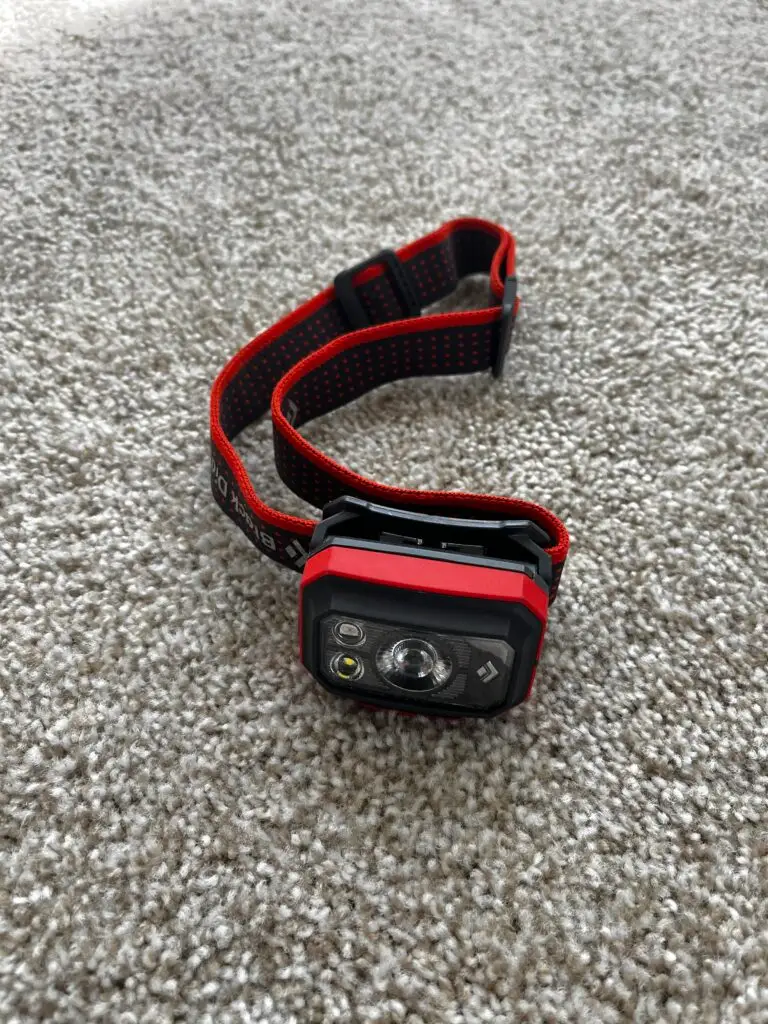
Eventually, one of your canyon adventures will go long, and hiking out in the dark will be unavoidable.
You’ll be glad you packed a reliable headlamp.
Why Headlamps Are Essential for Canyoneering
Navigation in Low Light: Essential for exploring dark sections of canyons, tunnels, or sudden nightfall. Also, includes long canyon approaches before sunrise and long canyon exits after the sun has set.
Hands-Free Operation: Keeps both hands available for hiking, sequencing, rappelling, or gear management.
Safety: Illuminates potential hazards like loose rocks, cliff drop-offs, potholes, or slippery surfaces.
Backup Essentials
Extra Batteries: Ensure your headlamp remains functional throughout your trip.
USB Power Bank with Cables: Recharge headlamps with built-in batteries or other essential devices like GPS units.
Potential Risks Without Backups
Increased Injury Risk: Limited visibility increases danger during night navigation or emergencies.
Trip Delays: Group movement halts if lighting fails.
Loss of Direction: Navigating canyons without light can lead to disorientation or falls off of edges!
1. Choose the Right Headlamp:
High lumens (200+ for rugged terrain).
Adjustable beam settings (flood for general use, spot for detail).
Water resistance/proof (IPX4 or higher).
2. Carry Spare Power Sources:
Pack lightweight extra batteries (AA, AAA, or proprietary) or a compact power bank with appropriate cables too.
Store batteries and cables in a waterproof container.
3. Test Before Leaving:
Fully charge or replace batteries pre-trip.
Check beam brightness and ensure the light and buttons works.
Buy From:
Rain/Light Jacket & Extra Socks

Why Layers Are Critical in Canyoneering
Temperature Regulation: Slot canyons can be cold, especially after swimming or when the sun sets.
Protection Against Elements: Rain jackets shield against sudden weather changes and hypothermia risks.
Enhanced Insulation: Combining a breathable, lightweight jacket with a waterproof outer layer retains body heat.
Waterproof Rain Jacket
Waterproofing: Protects against rain
Windproof Layer: Shields against wind chill in exposed areas, especially at rappel stations.
Layering Benefits: Paired with Polartec AlphaDirect jacket, traps body heat while preventing water/wind from entering.
Polartec Alpha Direct (Lightweight Jacket)
Breathability: Allows moisture to escape, reducing sweat build-up while keeping you warm. (My favorite part about it!)
Lightweight and Packable: Easy to carry without adding bulk to your gear.
Quick Drying: Ideal after swims in slot canyons or when it is cold on the approach and exit hikes.
Pro Tips for Layering in Slot Canyons
Post-Swim Warmth: Wear a Polartec Alpha Direct jacket immediately after swimming to minimize heat loss.
Add Rain Protection: Use a waterproof jacket over the lightweight layer for maximizing warmth and dryness.
Carry Compact Gear: Opt for lightweight and compressible jackets to save space in your pack.
Store in Drybag: Ensure jackets/socks/etc. are stored in a drybag in the case of accidental water submersion.
Buy From:
GPS

A GPS with satellite capability is more than a navigation tool—it’s a critical lifeline in the world of canyoneering! From communication updates to family members to sending out a SOS to local Search and Rescue (SAR) teams in times of emergency – they are worth the cost, especially as you can not put a price on yourself, loved ones, friends, and strangers.
The Role of GPS in Canyoneering:
Navigation: Provides precise location data, helping you stay on route in remote slot canyons.*
Emergency Communication: Satellite-enabled GPS devices allow you to send SOS signals and communicate even without cellular service.
Trip Tracking: Record your path for future reference or share with others for safety.
Key Features to Look For
Satellite Messaging: Ensures communication in areas with no cell service.
Topo Maps: Topographic maps tailored for backcountry navigation.*
Weather Updates: Receive critical forecasts to adjust plans (if your subscription plan offers it)
Durability: Waterproof, shockproof, and designed for rugged use.
Pro Tips
Plan Ahead: Familiarize yourself with the GPS interface before heading out.
Carry Backup Power: Bring a portable power bank to keep the device charged.
Mark Key Points: Save waypoints for entry/exit, water sources, and hazards.
*NOTE – GPS/Satellite devices don’t work well while IN slot canyons. But give it a try, however!
Buy From:
Garmin GPSMap 66i (with satellite messaging plan)**
Garmin inReach Mini 2 (with satellite messaging plan)**
Garmin Montana 710i (with satellite messaging plan)**
Garmin eTrex 22x (NO satellite messaging plan, but reliable, affordable GPS)**
SavedBySpot: SpotX (with satellite messaging plan)**
ZOLEO (with satellite messaging plan)**
Starlink Direct-To-Cell (coming 2025 to T-Mobile)
** or newest model that they offer. But compare prices and features before purchasing.
First-Aid Kit
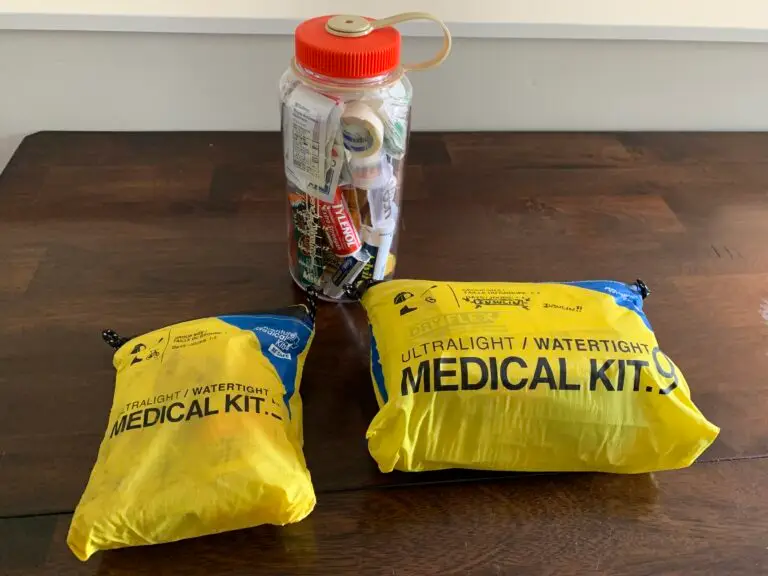
Why Bring a Kit?:
In remote canyons, help may be hours or days away. A first-aid kit helps manage minor injuries, stop bleeding, and stabilize serious conditions (like a sprain or fracture) until help arrives.
Must-Have Supplies:
Adhesive bandages, gauze, medical tape, antiseptic wipes
Blister treatments (e.g., Moleskin), tweezers
Personal medications and a pocket-size wilderness medical guide
Keep it lightweight and waterproof (store in a drybag or case).
Emergency Preparedness:
Stay calm, assess injuries, and decide if the team can continue or needs a rescue.
Carry a satellite communicator or emergency beacon—cell service is rare.
Ensure everyone knows basic first aid and canyon safety protocols before heading out.
A Personal Note:
As a Type 1 Diabetic, I carry insulin, syringes, and extra sugar in case of low blood sugar—critical for my survival in remote areas and canyons where supplies aren’t accessible for hours or days!
Buy From:
Adventure Medical Kits